Standing Desk Cable Management: 7 Steps to Zero Snags 2026
Category: How-To Guides | Reading time: 15 min | Last updated: October 2026
Disclosure: This post contains affiliate links. If you buy through our links we may earn a small commission at no extra cost to you.
Standing desk cable management is a different problem from regular desk cable management, and that is why most advice fails. A static desk needs its cables to stay tidy. A standing desk needs them to stay tidy while the desktop travels twenty inches or more, several times a day, pulling on every port and connector along the way.
You find out slowly when it goes wrong. A USB-C plug that works itself loose. A monitor that flickers only at standing height. An adapter dangling behind the desk by its own weight. A cable caught on a leg while the desk is already moving up.
The fix is a system, not a bag of clips. Seven steps, in this order.
Choosing between Thunderbolt generations changes which cable you need. Our Thunderbolt 4 vs 5 guide covers when a certified Thunderbolt 5 cable is required and when a cheaper USB4 cable does the same job.
Jump to a step
- Start here: the two zone rule
- Step 1: Measure travel, size your slack
- Step 2: Clamp the power strip to the desktop
- Step 3: Build the vertical crossing
- Step 4: Group by type, not into one bundle
- Step 5: Anchor with screws, not adhesive
- Step 6: Get monitor cables off the desktop
- Step 7: Run the break in cycles
- What goes wrong
- The full parts list
- FAQ
Start here: the two zone rule
Every cable at your desk belongs to one of two zones.
The moving zone is everything that travels with the desktop: monitors, laptop, dock, keyboard, mouse, speakers, desk lamp, and anything clamped to the desk edge.
The static zone is everything that stays put: the wall outlet, the floor, the network jack, and your tower if it sits on the ground.
The entire job is this. Put as much as you possibly can in the moving zone, then let exactly one cable cross between the two.
That one crossing cable is your power strip’s cord. Everything else plugs into the strip, and the strip rides with the desktop, so no other cable ever feels the desk move. If you use wired ethernet you will have a second crossing, which is fine as long as it runs the same path as the first.
This is also why generic cable management advice fails on a standing desk. Adhesive clips, zip ties and a tidy under-desk tray all assume zero crossings. They work beautifully right up until the desk moves.
If you have a fixed-height desk, our desk cable management guide covers the trays, sleeves and raceways that work when nothing travels. Come back here for the parts that have to survive movement.
Step 1: Measure travel, size your slack
A service loop is deliberate extra cable length left in the routing path so cables lengthen as the desk rises instead of pulling tight. It is the single most important concept here, and it takes two minutes of measuring to get right.
Lower the desk to its lowest working height and measure to the floor. Raise it to your standing height and measure again. The difference is your travel range. On most home standing desks that lands somewhere around twenty inches.
Now size the slack. Every cable crossing between zones needs its full travel range as extra length, plus a buffer so nothing ever reaches full tension. Two reference points:
- Eureka Ergonomic recommends a service loop of at least six inches, or 1.2 times your measured travel range, whichever is larger
- Navo recommends enough slack to reach full standing height plus a six to eight inch buffer
Those are two ways of saying the same thing. Take the larger result. On a twenty inch travel range, 1.2 times gives you twenty four inches of slack, and the buffer method gives you twenty eight. Build for twenty eight and you will never think about it again.
Then do the length math on the one cable that matters most. Measure from your outlet to the desk, add your travel range, add the buffer. A desk three feet from the wall with twenty inches of travel needs a power cord of at least five and a half feet before you have any margin at all. Five foot cords are standard, and on a standing desk they are frequently too short. Check this before you buy anything.
One thing not to do: do not create slack by coiling a cable into a tight loop and zip tying it. A tight coil on a power cable traps heat, and over-tightened bundles damage insulation over time. Slack should hang in a loose, open curve.
Step 2: Clamp the power strip to the desktop
This is the step that makes the whole system work. Mounting the power strip to the moving desktop means every device cable stays entirely inside the moving zone and never experiences the desk’s travel. Only the strip’s own cord crosses to the wall.
A clamp mount is the right fastener here. Screwing a strip into the underside of a thin desktop puts all the load on a few short screws, and adhesive mounts fail under the vibration of repeated travel. A clamp grips the desk edge and does not care how many times the desk moves.

The reason this one fits a standing desk is the clamp plus the 70W USB-C. The clamp holds firmly enough that you can plug and unplug with one hand without the strip shifting, which matters when it is mounted above your knees. The 70W port replaces your laptop charger entirely, so one more power brick disappears from the system.
Two things to check before you order. The clamp needs a flat desk edge between 0.6 and 1.8 inches thick, so curved edges, edges sloped more than 45 degrees, and desktops with no overhang will not work. And the cord is five feet, which per the math in Step 1 is workable only if your outlet is close. Measure first.
“Needed a laptop charge in this format. None of the other chargers were offering that. This is my main mobile charger now for Samsung. It charges at super fast charge 3! On top of that it has 6 extra power ports. Such a great implementation. Using it for couple of months now. No issues whatsoever. Highly recommend.”
Who it’s for: Anyone with a standing desk and more than three things that need power.
Pros:
- Clamp mount survives repeated travel where adhesive does not
- 70W USB-C removes a laptop brick from the setup
- UL and ETL certified with 1500J surge protection and overload shutoff
Cons:
- Five foot cord is tight for a desk more than a few feet from the outlet
- Will not clamp to curved or heavily sloped desk edges
Where not to mount it
This part is worth getting right. Never mount a power strip, transformer or any heat producing adapter directly over your desk’s lift motors, control box, or anti-collision sensors. Heat from a power strip is enough to shorten the life of the control electronics, and blocking the sensors interferes with the collision detection that stops your desk crushing whatever is underneath it.
Clamp to the front or side edge of the desktop instead, well clear of the frame hardware. If you want outlets facing away from your knees, pick a strip with side facing or rotated outlets rather than ones that point straight out, and use angled or low profile plugs where you can.
For context on the standards involved, UL 962 is the safety standard covering household and commercial furnishings including height adjustable desks. A strip carrying an independent UL or ETL mark has been tested by a third party rather than self-certified. This is not professional electrical advice, and if you are unsure about anything in your setup, ask a qualified electrician.
Step 3: Build the vertical crossing
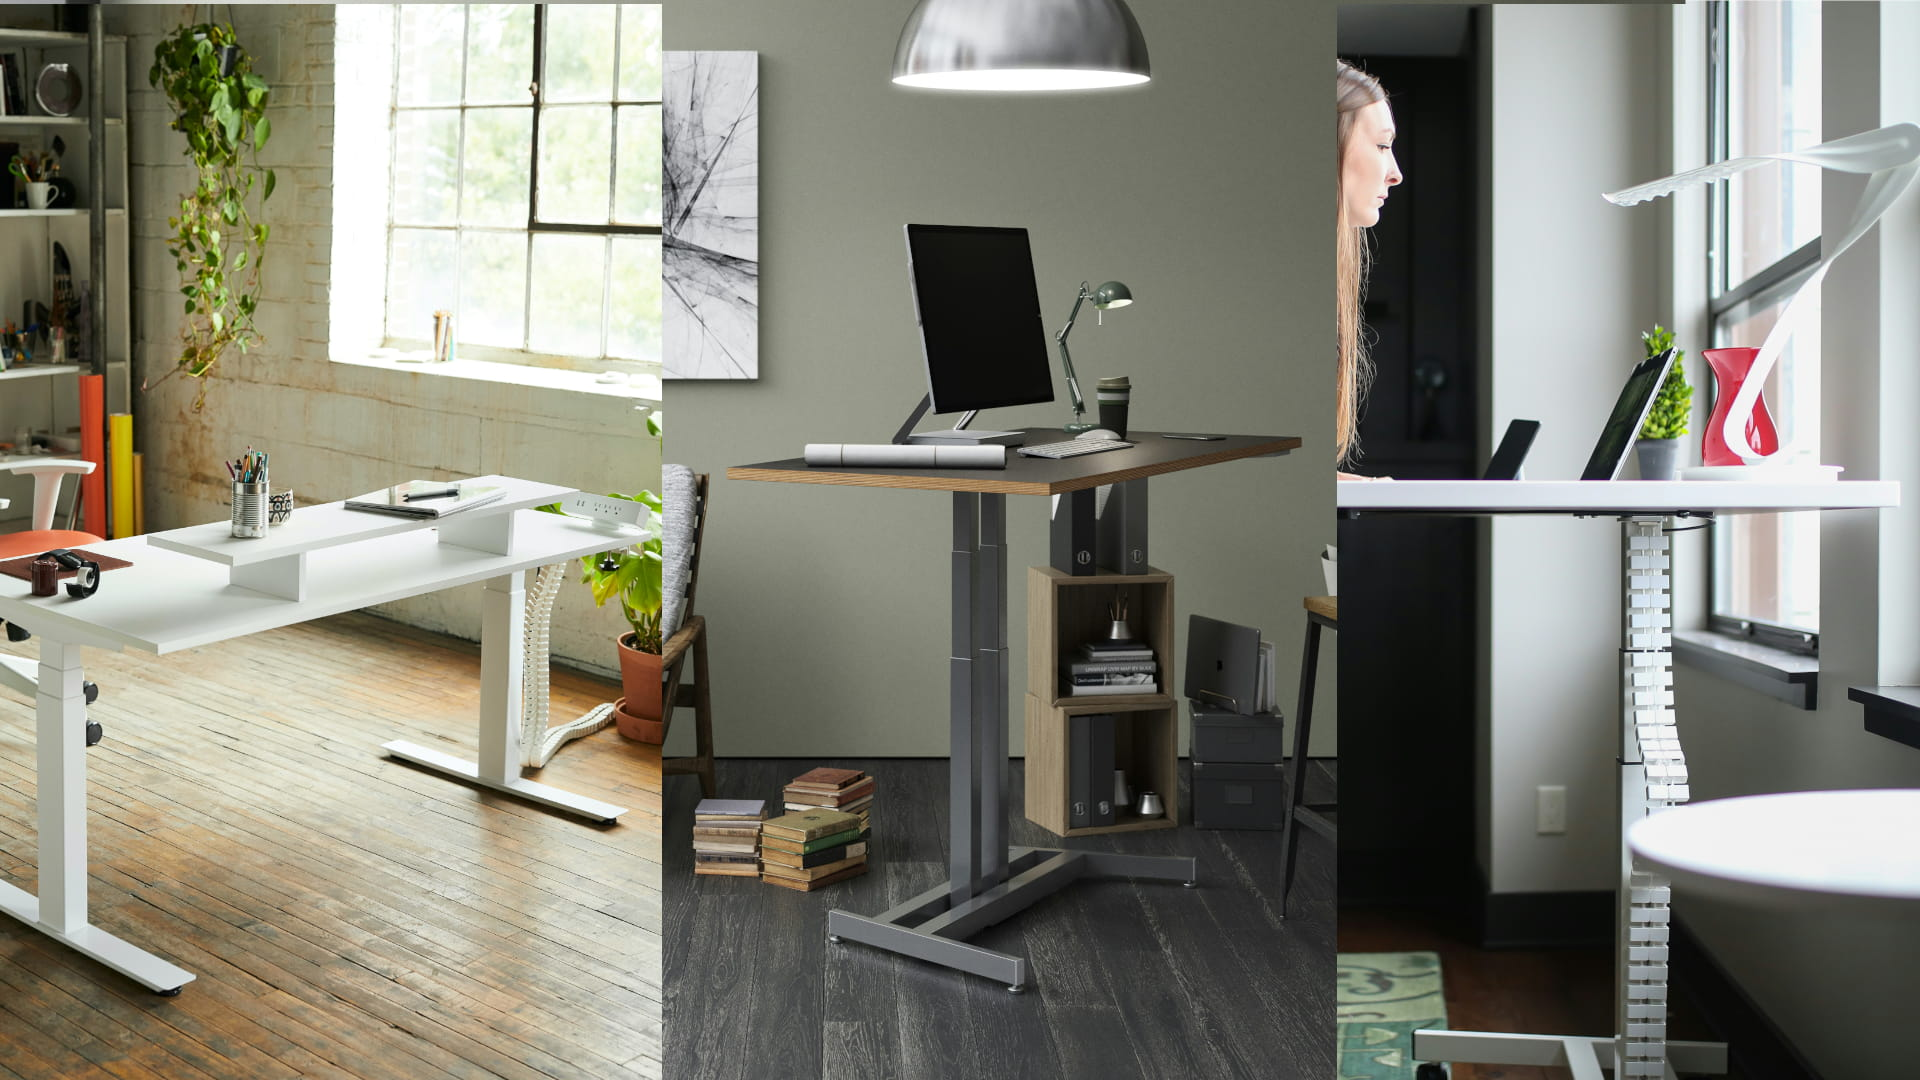
You now have one or two cables that have to travel from a desktop that moves to a floor that does not. That crossing needs a flexible, guided path. Left loose, it is the cable that snags on a leg, catches a chair wheel, or swings into the frame.
You have three options, and only one is really built for this:
| Option | How it behaves on a moving desk |
|---|---|
| Cable spine or vertebrae | Rigid segmented column that flexes as the desk rises and contracts as it lowers. Keeps cables on one controlled path at every height. |
| Fabric sleeve | Bundles cables but does not control where the bundle goes. Fine inside the moving zone, poor as the crossing. |
| Nothing | The default. Cables hang, swing, and eventually snag. |
A spine is the correct answer for the crossing. A sleeve is the correct answer for bundling cables that stay in the moving zone, which is Step 4.

Length is the spec that decides whether a spine works, and this is where cheap ones fail. At 133cm this one is just over fifty two inches, which clears the fifty inch threshold that keeps a spine from dangling at full extension. Standing desks commonly top out around forty eight inches, and treadmill desk setups reach higher still, so a short spine runs out of travel exactly when you need it.
The magnetic mounting is the other reason to pick this one. It is designed to install behind one of the metal legs, with magnetic fittings at the top and bottom plus magnetic inserts that hold the chain flat against the vertical leg. Magnets let the spine shift slightly as the desk travels instead of fighting a fixed anchor point, and they come off without adhesive residue when you reorganize. The trade off is that magnets need a steel frame. Most standing desk legs are steel so this is usually a non-issue, but check yours if you have an aluminum frame.
Two honest notes from owners. It ships with two magnetic inserts, which is enough but not generous, and a few more would make the run along the leg tidier. And the finish is closer to dark charcoal gray than true black, which matters only if you are matching it to something.
Cut it to length rather than leaving the full run coiled at the bottom. You want the spine to span the gap with a gentle curve at both ends, not to pool on the floor.
“I read reviews and looked at all the various vertebrae on Amazon designed for concealing cables running from the floor to the desk. I thought it was the best in terms of function for my sit-stand desk situation. It is specifically designed to be installed behind one of the metal legs and it has magnetic fittings at top and bottom to secure it. It also comes with two magnetic inserts to secure the chain along the vertical leg. They could have provided a couple more of those. The plastic is very substantial and the links easily accommodate the insertion of numerous cables. Although it is described as black in color, it is closer to a dark charcoal gray. Overall, I am very happy with this and would purchase again.”
Who it’s for: Every standing desk. This is the part that makes the crossing survivable.
Pros:
- Long enough at 133cm to stay clear of the floor at full desk height
- Magnetic mount moves with the desk instead of resisting it
- Links are wide enough to take a full set of cables
- Shortens to fit without tools
Cons:
- Magnets need a steel desk frame
- Only two magnetic inserts included for the vertical run
- Finish is dark charcoal rather than true black
Step 4: Group by type, not into one bundle
The instinct is to gather every cable into one thick sleeve. Do not. Bundling power, video and USB tightly together invites interference, and the thicker the bundle, the more force it takes to flex, which puts that force straight back onto your ports.
Group by type instead, with each group routed separately:
- Power runs to the strip, which is already on the desktop
- Video runs from monitor to laptop or dock, entirely within the moving zone
- USB and peripherals run to the dock or laptop, also entirely within the moving zone
Notice that only group one involves the crossing. Video and USB cables never leave the moving zone, which means they do not need to be long. They need to be exactly the right length, dressed flat under the desktop.
Why cable length is a cable management decision
Picking the right length is half the job. Too short and the cable pulls against its connector every time something shifts. Too long and you are managing a coil of slack you never needed.
The rule follows the zones. Cables that stay in the moving zone can be short, because the distance they cover never changes. Only cables crossing to the static zone need the travel range added on.
The best case: one cable does everything
Before you buy any video cable, check whether you need one at all. If your laptop has a USB-C port supporting DisplayPort Alt Mode and your monitor has a USB-C input, a single cable can carry video, data and power to the laptop at the same time. Plug in one cable and the monitor drives the display, the dock passes through your peripherals, and the laptop charges.
This is the correct answer for a standing desk, and it is worth checking your ports for. One cable in the moving zone is less to route, less to clip, less to flex, and nothing to pull loose when the desk travels. It also means the only cable in your whole setup that crosses zones is the power strip’s cord.
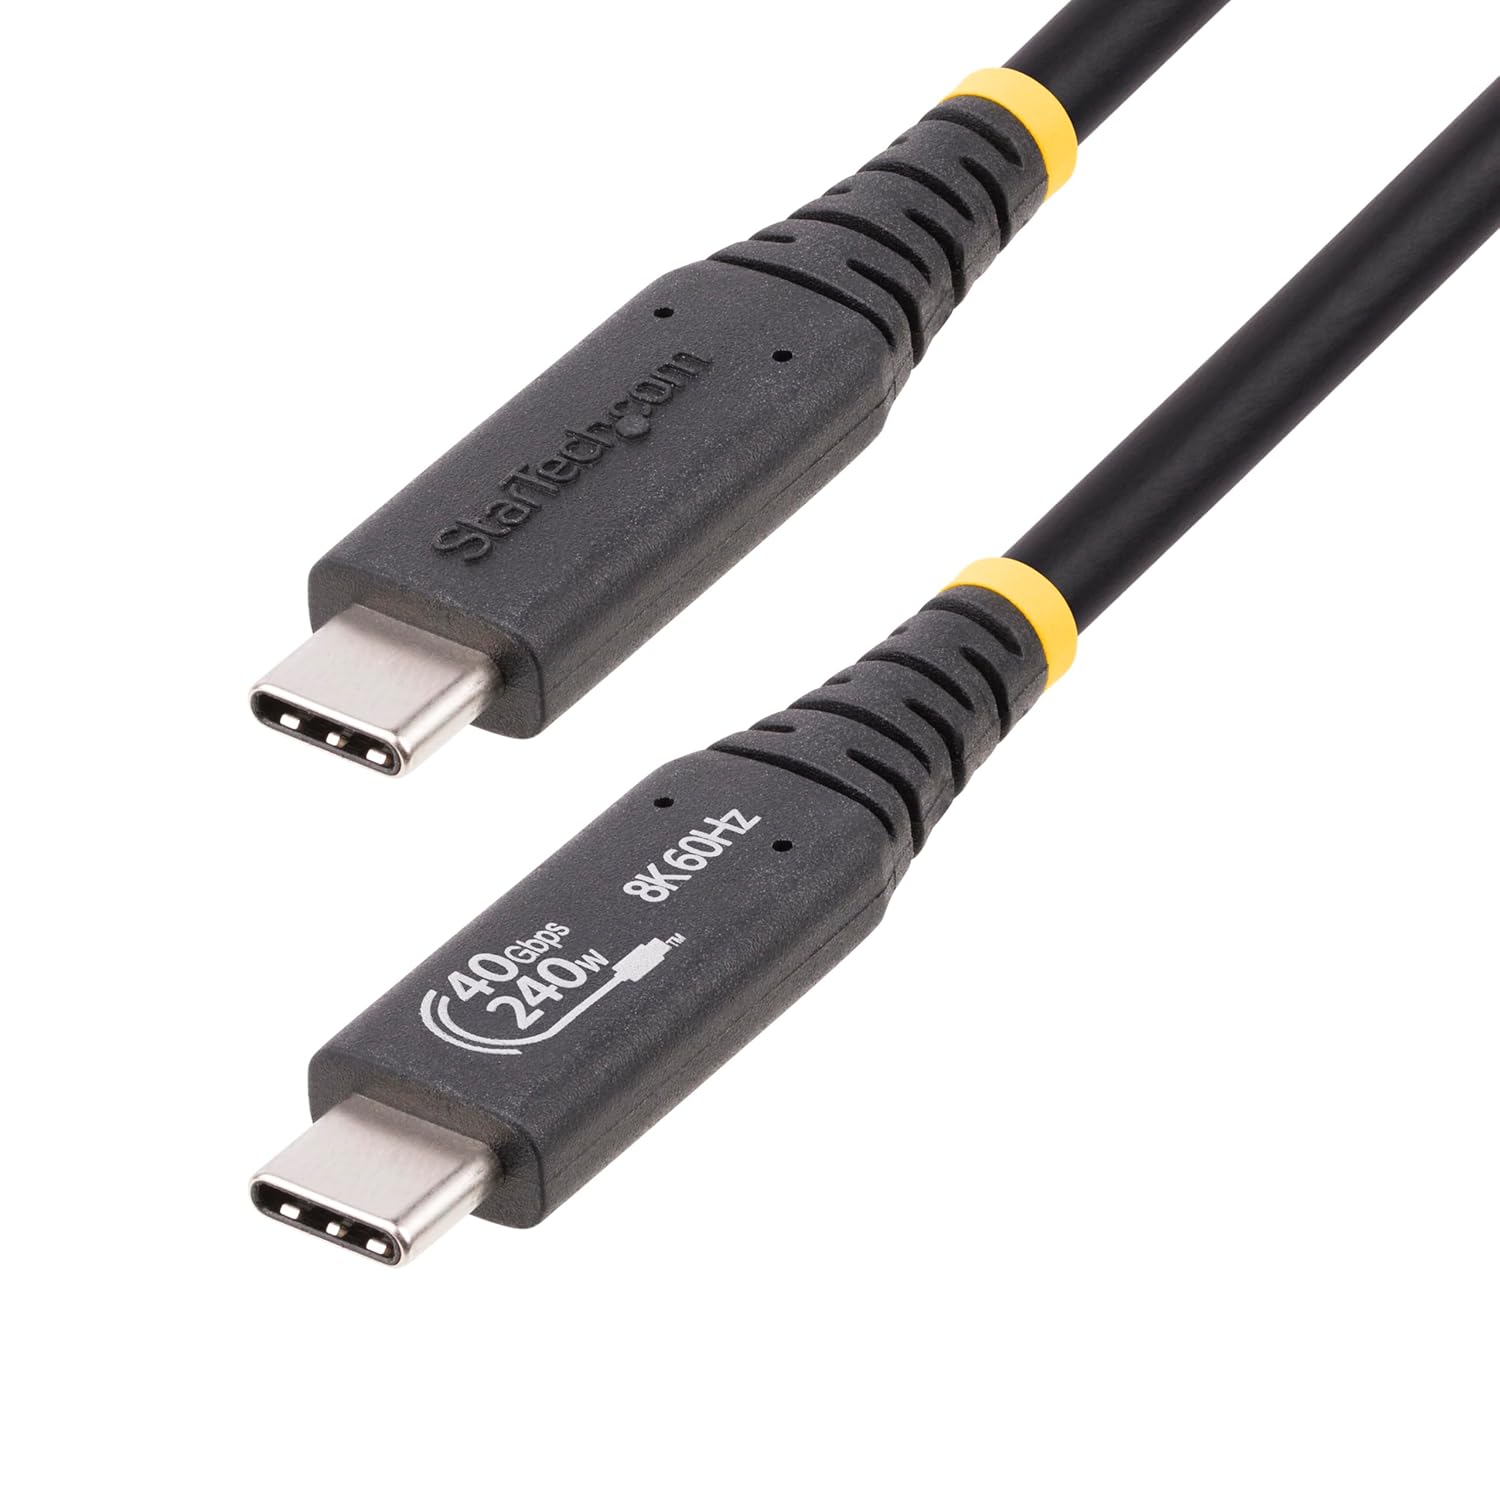
Two specs make this the right pick here rather than a cheaper USB-C cable. The first is the 4.8mm outer diameter with a flexible jacket. Most high bandwidth USB-C cables are thick and stiff, which fights every clip and every curve you ask it to make. A thin, flexible cable routes where you put it. The second is USB-IF certification with an E-marker chip, which means the cable negotiates power correctly instead of guessing, and that matters on a cable pushing up to 240W into your laptop.
The limitation is length. At 3.3 feet this reaches from a laptop to a monitor sitting next to it on the same desktop, which is the scenario it is built for. It will not reach a dock on the floor or a monitor at the far end of a wide desk. Measure the actual run before ordering, and note that a longer USB4 cable is a meaningfully different and more expensive product because of the bandwidth involved.
If your ports do not support DisplayPort Alt Mode, or the run is longer than three feet, use a dedicated video cable instead.


That last point catches people out regularly. We ran into it testing monitors for our ultrawide vs dual monitors comparison, where one panel’s headline refresh rate was only reachable over DisplayPort and capped well below it over HDMI.
Two things about that DisplayPort cable specifically, because both affect routing. It is a thick, stiff cable, which owners note makes it awkward to feed through a monitor arm channel or a tight cable run. Plan its path before you clip anything down, and give it a wider curve than you would a thin cable. It also has no latching connector, unlike most DisplayPort cables. That makes it easy to unplug, and easy to come unplugged. On a desk that moves, treat that as a reason to be generous with the service loop in Step 1, because a latchless connector under even light tension is the one most likely to work loose.
The one peripheral cable that does need length
There is a single exception to the rule that moving zone cables stay short. If your desktop tower sits on the floor, the cable from tower to desk is crossing zones, exactly like the power cord. That one needs your full travel range plus buffer.

The 5,000 bend rating is the number to care about on any crossing cable. A cable that flexes twice a day for three years is looking at a few thousand cycles, so a braided jacket rated for that range is not marketing, it is the minimum.
If everything on your desk travels with the desktop and nothing sits on the floor, you do not need this cable. Keep your runs short instead.
If you want to bundle the moving zone cables once they are grouped, a fabric sleeve is the right tool, and the options in our desk cable management guide all work here. Just keep the bundle loose enough to flex by hand.
Step 5: Anchor with screws, not adhesive
Adhesive cable clips are the most common failure point in a standing desk setup, and they fail in the worst way: slowly. The bond holds for weeks, softens with the daily vibration of the lift mechanism and the warmth under a loaded desktop, and then releases one clip at a time until a cable is hanging where it can catch.
Screw mounted clips do not do this. On the underside of a desktop, where nobody sees them, there is no reason to accept an adhesive bond that has to survive thousands of travel cycles.

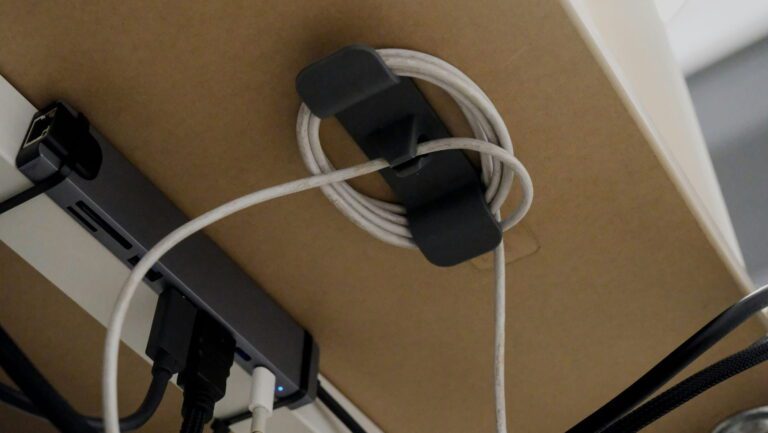
The ridged grip is the detail that matters on a moving desk. A smooth clip lets the cable creep through it a little with every height change, and over months that creep is what pulls your service loop out of position. Ridges hold the cable where you put it.
Space them every eight to twelve inches along each run. That is close enough that no section of cable can sag into the frame, and it keeps the load spread so no single clip carries a heavy adapter.
The useful trick with these is that you set the grip by how deep you drive the screw. Back it off slightly and the cable can slide, which is what you want while you are still positioning a run. Drive it home and the cable locks. That makes them forgiving to install, because you are not committed until the last quarter turn.
Two practical notes. These take a single cable or a thin pair, not a thick bundle, so route your groups as separate runs rather than trying to force a sleeved bundle into one clip. And check your screw length against your desktop thickness before driving, because a screw that is too long on a thin laminate top will come through the work surface. A hundred pack sounds excessive until you start spacing properly, at which point it is about right.
“Best wire clips I have used so far. Easy to install, sturdy, perfect diameter for Starlink cable. You can adjust the tightness from how deep you drill the screw. Good value. I have used them so far for indoor and outdoor use.”
Who it’s for: Anyone whose adhesive clips have already fallen off once.
Pros:
- Screw mount cannot release under vibration or warmth
- Grip adjusts by screw depth, so you can reposition before committing
- Ridges stop the cable creeping out of position
- Pre-installed screws make a hundred clips fast to fit
Cons:
- Requires driving screws into the underside of the desktop
- Sized for single cables, not thick bundles
Step 6: Get monitor cables off the desktop
A monitor sitting on its factory stand puts its cables where they get pinched: flat on the desktop, running to the back edge, dragging whenever you reposition anything. A monitor arm routes those cables up through the arm and out of the way, and it frees the desk space underneath.
There is a second benefit specific to standing desks. A monitor on a tall factory stand has a high center of gravity, and acceleration at the start and end of each height change is enough to make it wobble. An arm clamped to the desk edge holds the screen rigid through the whole travel.

The tool-free cable clips are the part that earns its place in this guide. Cable routing inside an arm is only useful if you can reopen it, and clips that need a tool mean you leave cables loose rather than redo the job every time something changes.
Check two numbers before ordering. The weight limit is 19.8 lbs, and a large ultrawide can land close to or above that once you remove the factory stand, so weigh yours or check the spec sheet. And confirm your VESA pattern is 75x75mm or 100x100mm, because manufacturer listings get this wrong often enough that it is worth verifying against the panel itself.
The core mechanism was tested through more than twenty thousand cycles, which is the spec you want when the arm is going to ride a desk up and down daily for years.
One real weakness to know about. The tension adjustment hardware is soft, and owners report the bolts scratching and stripping if you keep adjusting them. Set the tension once for your monitor’s weight, gently, and then leave it alone. That is not a hard ask on a monitor arm, but it does mean this is the wrong pick if you swap displays frequently.
“I use it to hold my ASUS TUF gaming monitor, it weighs maybe 8lbs, 24 inch. It holds it with no trouble at all. It can go up down left right side to side. The bad thing is the screws and metal could strip so easily, I’m over here trying to loosen or tighten the tension and it scratches the metal bolts, so you’ll have to be very careful when doing that. It has a little plastic clip piece that manages your cables, another plus, keeps the desk looking neat and saves me from putting zip ties on. Height is good too, it gets pretty high up and low down.”
Who it’s for: Anyone whose monitor cables currently run across the desktop.
Pros:
- Routes monitor cables up and out of the work surface
- Holds the screen steady through desk travel
- Clamp or grommet mount, tool-free VESA attachment
- Cable clips open by hand, so you can redo a run later
Cons:
- Tension bolts strip easily if adjusted repeatedly
- 19.8 lb limit rules out some large ultrawides
- Requires a desk edge or grommet hole to mount
For more options, our best monitor arm guide covers arms across the range, including dual setups and heavier displays. If you would rather keep the factory stand, our best monitor stand guide covers risers that sit on the desktop instead.
Step 7: Run the break in cycles
Do not secure anything permanently until you have tested. This is the step people skip, and it is the reason so many setups get rebuilt.
Route everything loosely first, with clips hand-tightened or left off. Then:
- Raise the desk to maximum height and look at every cable. Any cable under visible tension needs more slack. Go back to Step 1.
- Lower to minimum height and look again. Any cable touching the floor or pooling has too much slack, or the spine needs shortening.
- Check the chair’s rolling lane. Nothing should cross the floor where your wheels travel.
- Watch the spine through a full cycle. It should flex smoothly without catching the leg or the frame hardware.
- Confirm the collision sensors are unobstructed and nothing sits above the motors or control box.
Once it passes all five, tighten the clips and run thirty to fifty full up and down cycles. This is a break in period, and it matters because the failures you are looking for are fatigue failures. A clip that holds for one cycle may walk loose over thirty. Slack that looks fine at rest may settle into a different position once the cables have flexed a few dozen times.
Check it once more after the cycles. If nothing has moved, you are done, and you will not think about your cables again.
What goes wrong
Six failures account for nearly every standing desk cable problem.
No service loop. Cables pull taut at full height and lever against their connectors. This is the one that eventually kills a port.
A power cord that only reaches at sitting height. Measure to the wall from the desk’s maximum height, not from where it happens to be sitting.
Static desk hardware. Adhesive clips and zip ties sized for a fixed desk. They hold at first, which is what makes them dangerous.
One thick bundle. Everything sleeved together is stiff, flexes poorly, and puts that stiffness back into your ports. Group by type and route separately.
Cables in the rolling lane. A cable crossing the floor where your chair travels will get caught, and the chair has more leverage than the connector does.
Securing before testing. Every problem above is easy to fix while the clips are loose and painful once the screws are in and the adhesive has cured.
One more worth its own line: unsupported weight. A heavy power brick or dock hanging on its own cable puts constant load on the connector at both ends. Either it sits in a tray or it is clipped so the cable is not carrying it.
The full parts list
| Job | Pick |
|---|---|
| Power on the moving desktop | Anker Nano Power Strip with Desk Clamp |
| The vertical crossing | Ultimate Setup Cable Management Vertebrae |
| Anchoring runs under the desktop | THE CIMPLE CO Screw-In Cable Clips |
| Video, data and power in one cable | StarTech USB4 USB-C Cable, 3.3 ft |
| Monitor video, standard | Amazon Basics HDMI Cable, 6 ft |
| Monitor video, high refresh rate | Amazon Basics DisplayPort 1.4 Cable, 6 ft |
| Floor standing tower to desktop | Anker USB-C to USB-C Cable, 10 ft |
| Monitor cables off the desktop | ErGear Single Monitor Arm |
If you are still choosing a desk, our best standing desks guide covers the full range and our best budget standing desks guide covers the cheaper frames worth buying. Once it is assembled, our standing desk height calculator gives you the sitting and standing numbers to set your presets to.
Frequently asked questions
How much cable slack does a standing desk need?
Measure the difference between your lowest and highest desk height to get your travel range, then give every crossing cable that much extra length plus a six to eight inch buffer. Eureka Ergonomic suggests a service loop of at least six inches or 1.2 times your travel range, whichever is larger. On a twenty inch travel range, plan on roughly twenty four to twenty eight inches of slack.
Can I just use zip ties and adhesive clips on a standing desk?
They will work for a while and then fail. Adhesive softens under the warmth and vibration of a loaded, moving desktop, and zip ties create tight bundles that resist flexing and push that resistance back into your ports. Screw mounted clips and a flexible spine are built for movement.
Is a cable spine or a cable sleeve better for a standing desk?
Both, for different jobs. A spine handles the vertical crossing between the moving desktop and the static floor, because it guides cables along one controlled path at every height. A sleeve bundles cables that stay on the desktop. Using a sleeve for the crossing leaves the bundle free to swing and snag.
How long should a cable spine be?
Over fifty inches. Standing desks commonly reach around forty eight inches at full height and treadmill setups go higher, so a shorter spine runs out of length and dangles exactly when the desk is fully raised. The spine recommended here is 133cm, a little over fifty two inches, and shortens if you need less.
Is it safe to mount a power strip under a standing desk?
Yes, with two conditions. Use a strip with an independent UL or ETL mark and overload protection, and keep it away from the lift motors, control box and anti-collision sensors, because heat shortens the life of those components and blocking the sensors interferes with collision detection. Clamp to the desktop edge rather than mounting on the frame. If any part of your setup is unclear, ask a qualified electrician.
Can one USB-C cable handle my monitor and charge my laptop?
Yes, if both ends support it, and it is the cleanest possible standing desk setup. Your laptop needs a USB-C port with DisplayPort Alt Mode and your monitor needs a USB-C input. One cable then carries video to the display, data for anything plugged into the monitor’s hub, and power back to the laptop. That leaves the power strip cord as the only cable in your setup crossing between the desktop and the wall. Check your laptop’s port specification before buying, because a USB-C port that only does charging and data will not drive a display.
Do monitor cables need to be long on a standing desk?
No, and this is the most useful thing to understand about the whole problem. A monitor sitting on the desk travels with it, so the distance between monitor and laptop never changes and a standard six foot cable is correct. Only cables crossing from the desk to the wall or floor need extra length.
Why does my monitor flicker only when the desk is raised?
Almost always a cable under tension at full height. The connector is being levered slightly out of the port as the desk rises, which is enough to disrupt the signal. Add slack and the flicker goes away. Left alone, it eventually becomes a damaged port.
Sources and references
- Solving the Slack Problem: Cable Management for Standing Desks, Hexcal
- Mount Power Strip Under Standing Desk Safely, Eureka Ergonomic
- How to Cable Manage a Standing Desk: Step-by-Step Guide, Navo Ergonomics
- Cable Management for Standing Desks: A Complete Setup Guide, UPLIFT Desk
- The Best Desk Cable Chains, WorkWhileWalking
- Desk Cable Management for a Home Office, Home Office Nomad
Continue reading
Prices change often. Check current pricing at checkout. Last updated October 2026.